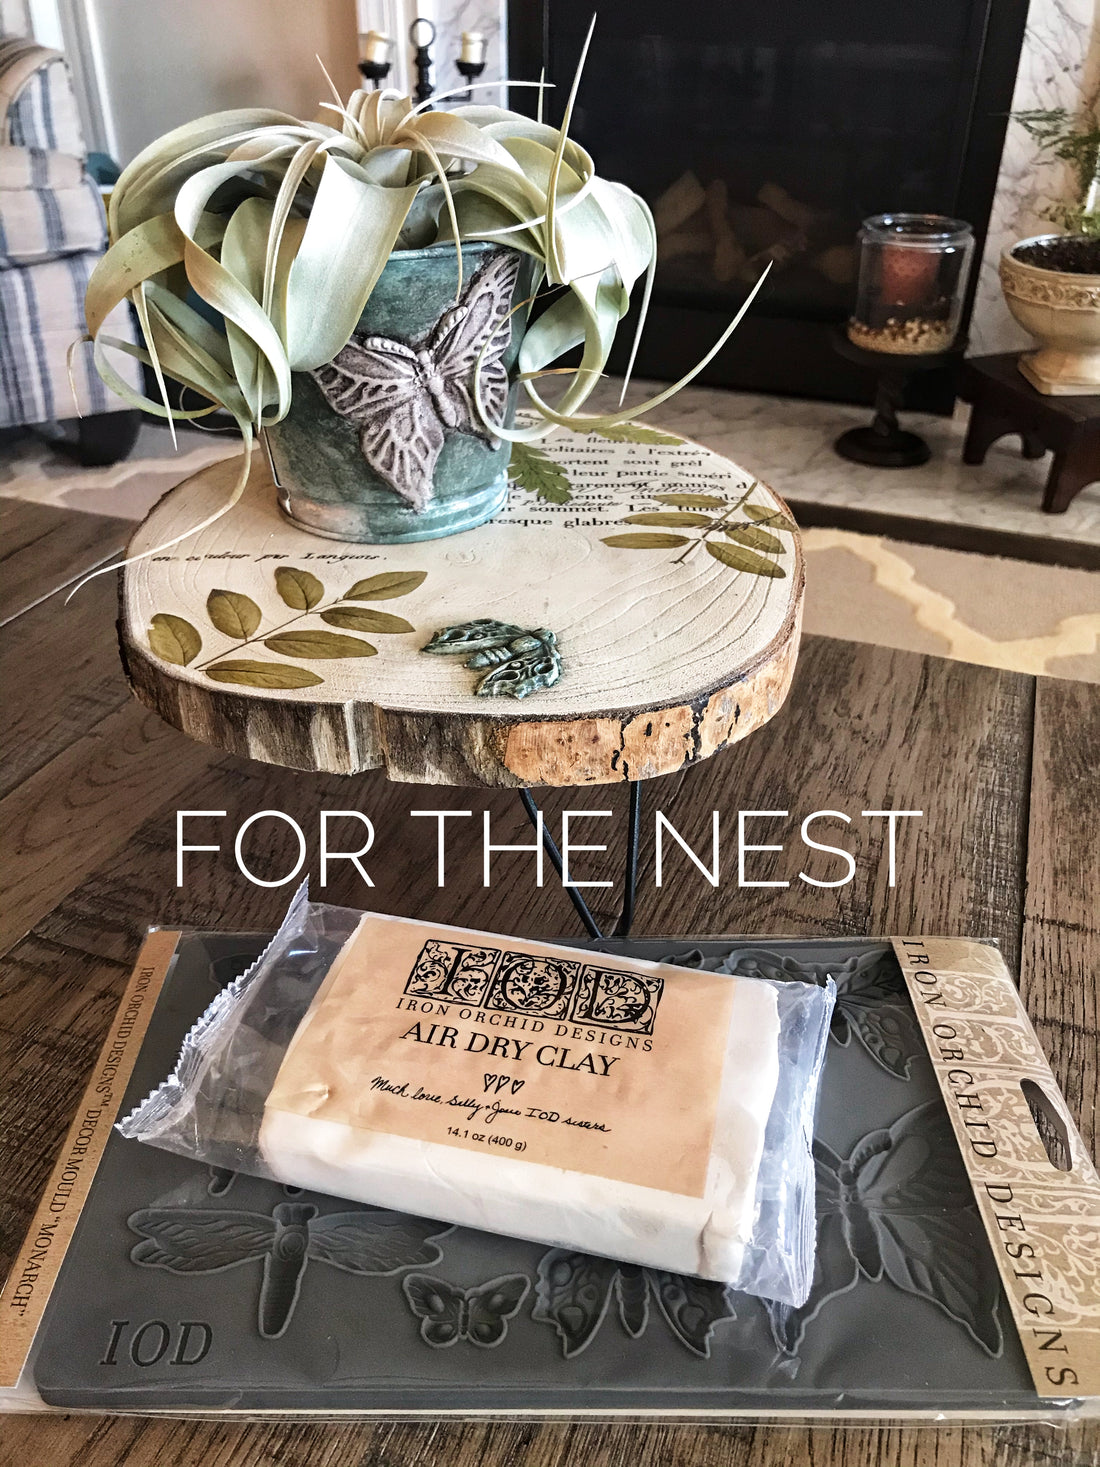

Wood slice plant stand with hairpin legs. IOD mould, air dry clay and Wise Owl Paints
Supply List:
- 9"-11" Wood Slice 1" thick
- Set of 3 small hairpin legs
- Small Galvanized pot
- Wise Owl Chalk Synthesis Paint (Isles Ave, Dried Thyme) or colors of your choice
- Wise Owl Clear Wax and Black Walnut Wax
- Iron Orchid Designs Mould (Monarch) or mould of your choice
- Iron Orchid Air Dry Clay
- Small amount of cornstarch
- Glue (Tightbond quick and thick)
- Scraps of Iron Orchid Designs transfer (Ferns & Fronds)
- Brushes Clingon R12 and Wise Owl Palm Brush
- Medium sand paper (150-200 grit)
Step by Step Instructions
- Lightly sand one side of your wood slice to make sure that the surface you will be painting is smooth. This is not a major sanding job but enough so that there are no rough spots on your surface. Take a wet rag and remove any dust that has been produced from sanding.

- Mix your neutral paint color (Isles Ave) using your R12 brush you can paint a solid coat of paint over the top of your wood slice. I like to leave the bark on the edge exposed to give a frame-like look around the wood slice.

- While the wood slice is drying you can add a coat of paint over the galvanized pot. Using the same color, you will want to stipple the paint over the metal, allowing some of the metal to show through. I also used a paper towel to blot off some of the paint to give it a sponged look. Put aside to dry.
- Once the wood slice is dry to the touch you can add your second coat of neutral paint for full coverage.
- While the two pieces are drying you can get started on your moulds!! Open your package of air dry clay and pinch off a small wad of clay. Put the remaining open package of clay into a zip lock bag. This will prolong the moldability of the clay so that it lasts longer for other projects!
- Grab your mould and choose which designs you would like to add to your project. This is the fun part! You get to choose where to place them and how many. In my example I had one larger butterfly on the pot and a small moth on the stand. Take your cornstarch and lightly sprinkle into the moulds you will be using. I like to use a small brush to spread into the nooks and cranies of the mould. Dump out over a sink to get the excess out of your mould.

- Take your clay and press into your desired mould. You will want to have excess clay that is thicker than the actual mould. Then you will press off the excess with your thumb, using the micro rim that is surrounding the design. You can also use a old credit card to skim off the top of the clay. Both of these techniques work great, it is just your preference. See the photos for examples.


- Turn the mould upside down and let gravity help release the clay as you bend the mould it will pop out into your hand. You may need to get the edges started a little. If your mould is stuck you may need to redo and add a little extra cornstarch.
- Now grab your glue and squeeze out a small amount onto the back of your mould. You will want to spread it using your finger or a small craft stick to the edges of the clay, ensuring that the mould has full coverage of glue, especially the edges. Then place it where you would like to on your wood slice or pot.


- The tightbond glue works great as far as keeping the mould in place. But I let the clay dry for 5-10 minutes to get a little skin over the clay before you get to the painting.
- While waiting for the glue to dry you can take your transfers and place them around where you would like to adhere them. You will want to keep the white backing paper on so that they do not stick before you are sure of their placement. Once you are sure of their placement you can remove the white backing and commit to your placement by putting pressure on your transfer. Then using the plastic rubbing tool, rub the transfer to release onto your surface. You can add these to the pot and the wood slice. It is up to you where you place them.


- Using the same neutral paint color go over the moulds to blend into the base. Let this dry completely. I will usually allow this to dry overnight so that if there are any separations in the clay, I can fill those in before the the next step.
- Using the accent color of Wise Owl Chalk Synthesis Paint (Dried Thyme) you can take your brush and get a small amount of paint on the brush and stipple into your mould. You can add a little spritz of water if you want to have a washed look. You can also use a small artist brush to paint this step as you may only want to paint the clay area and not the area around the mould. I used a paper towel again to blot off some the accent paint to allow the undercoat to show through. Allow this to dry completely.

- Once your project is done and you are happy with the transfers and moulds and paint we are ready to seal. I like to use the clear wax first. Using the palm brush, get a small amount of clear wax on the brush and apply lightly all over both projects.

- Then you can buff off using a lint free cloth or blue shop towel. Do the same with the black walnut wax, make sure to get into all of the groves in your moulds.

- Then buff off again using the same rag or cloth. This will wipe away a lot of the black walnut wax but leaving some for accentuating the details. Continue to buff off all over the wood slice as well and you are good to go! The wax will fully cure in 30 days.